
How to Sight in a Crossbow Scope – Guide and Adjustments
You’ve just pulled your new crossbow and crossbow scopes from the box. You’re itching to get in the woods. You can smell the morning dew and doe urine from your recliner. But, wait. You should probably sight it in first. On average, the sighting in process will take between twenty to thirty minutes. Not bad right? Half an hour spent sighting in a crossbow is no sweat off your back if it means that this is the year you finally out-hunt your father-in-law. Let’s take a look at what steps you need to take in order to fine tune your bow and insure that is is properly sighted just in time for your first hunt.
What Do You Need?
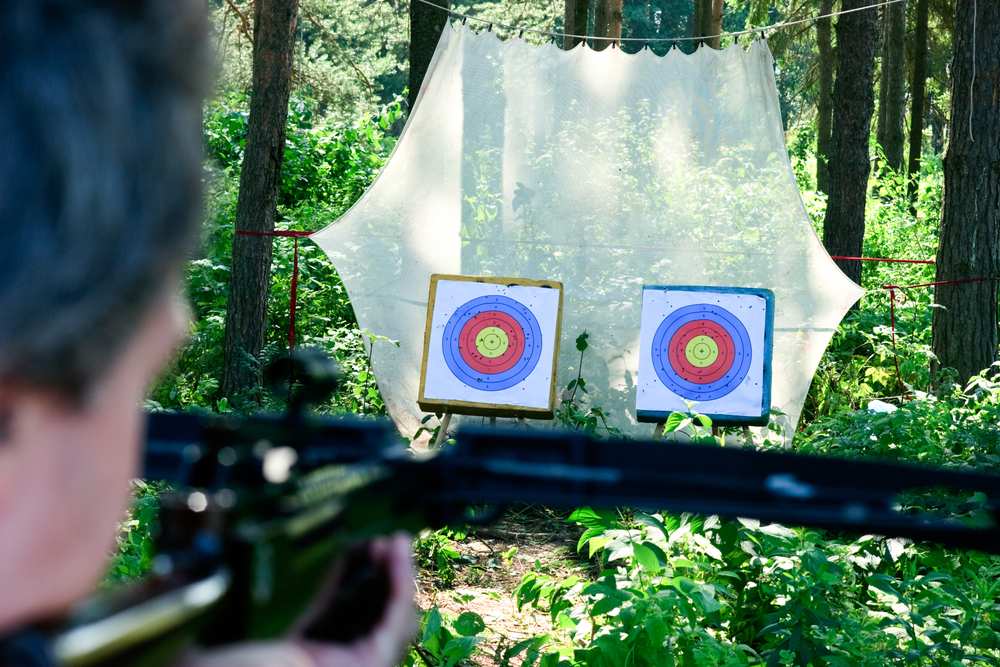
You won’t need much to get started but you do need to have at least 3-5 arrows, a target with a decent margin for error, the scope instruction manual, binoculars, and a crossbow rest. You will also need a set of screwdrivers sized to fit your scope adjustment knobs. Make sure that your scope is properly mounted onto your crossbow before you begin.
Mounting your Crossbow
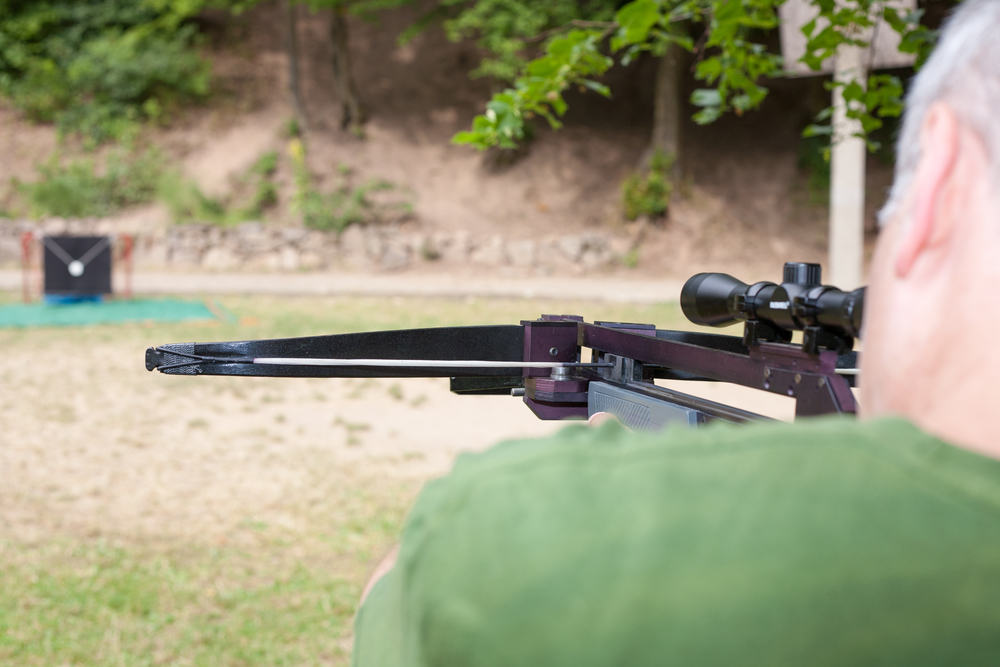
If your crossbow didn’t come with the scope or if you need to replace the scope over time you will need to know how is it to be mounted. To do this correctly you will need a few supplies such as: your crossbow, a level or leveling kit, your scope, scope rings, a padded vise, and Allen wrenches for adjustment. I highly recommend the use of a shooting aid or rest when sighting in a crossbow. This will greatly improve your accuracy and technique as well as prevent movement when you pull the trigger.
How Dots and Reticles Work
There are two primary scope times on the market today, the Variable Power Scope and Multi-Line Scope. Though they are similar, and the process followed when sighting them in is almost identical, there is one key difference between the two. The main difference is that the Variable Power Scope can be adjusted to account for the arrow speed. Reticles are created using reflective collimators to create an image. With a red dot scope, a battery is used to produce a single red LED light. Red dot scopes are one of the most affordable and adaptable options available. They offer great precision during a hunt. A multi reticle scope allows hunters to shoot at various distances without having to adjust the windage on the scope itself. When sighting in a crossbow the overall goal is to focus in the top most dot or reticle at each of the respective distances.
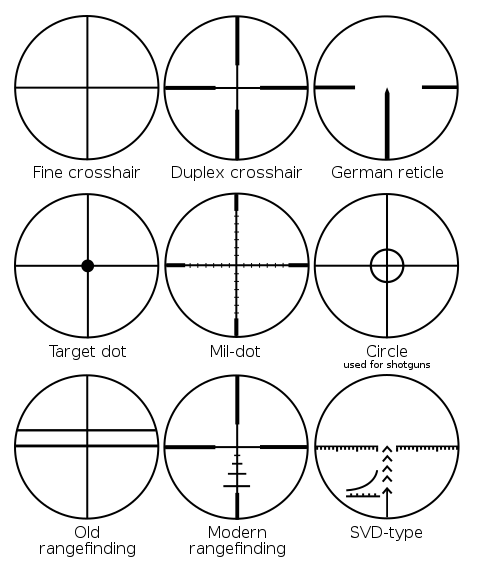
Types of Reticles:
- Non-Illuminated Reticles
- Illuminated Reticles
- Crosshairs
- Duplex Reticles
- Dot Reticles
Types of Dots:
- Reflex
- Prismatic
- Holographic
What Type of Scope are You Using?
As I mentioned above, there are two popular crossbow scopes on the market today. Before you begin sighting in your scope you need to figure out which type of scope you are working with. A bullet-drop compensating reticle scope is different than the more commonly used duplex reticle scope. Each mark on a BDC reticle is adjusted to a certain shooting distance. The distances are premeditated for accuracy and already accounting for the natural drop of the arrow that occurs due to gravity.
The red dot scope is easy to identify. It has a red dot in the center of the optical. Sounds easy right? Yes. However, because the red dot scope has scant magnification, it is not typically fitted for long range shooting. It works best at close to moderately close distances.
A multi-reticle scope is similar to a bullet drop compensating reticle scope because of its horizontal markings. These reticles are designed so that you can make more accurate shots without having to move into the target.
A ballistically calibrated scope has its advantages if and when you are hunting in extreme weather conditions. The reticle on this scope has been calibrated to consider each of the components that contribute to the arrow drop. These factors can include arrow weight, velocity, and the current temperature. These types of scopes are intended for precise shooting.
The variable power scope offers variable magnification. To put it simply, you can zoom in or out in order to meet your needs.
A fixed-power crossbow scope doesn’t require adjustment knobs. They are simple but they have great clarity and allow you to see a target more clearly at a greater distance.
Finally, a night vision crossbow scope. Obviously, this is handy when hunting at night, before the sunrise, or in an environment with minimal light. It is equipped with an illuminator in order to improve sight, increase precision, and steady the crossbows accuracy in the most extreme of conditions.
Choosing the right scope is vital if you wish to get your crossbow sighted in to the point that you are consistently hitting your target when making a shot.
Elevation and Windage Adjustment
Every scope, whether using a crossbow or a rifle, comes equipped with windage and elevation adjustments. In order to adjust the settings you will need to remove the respective capping. The windage adjustment knob will determine how far your shot may undulate side to side, left to right. The elevation adjustments will calibrate how far up or down your shot will need to be. A coin or a flathead screwdriver will work for adjusting the variances.
On most crossbow scopes you turn the elevation adjustment knob clockwise to increase the shot’s point of impact. Counter-clockwise would lower the point of impact. A “click” on the adjustment knob will move your arrow point of impact 1/10″ if shooting from 10 yards. Therefore, at 10 yards away from your target, 10 clicks of your adjustment knob would correspond to 1 inch of adjustment. For windage, you turn the dial clockwise to aim your shot to the right and counter-clockwise to aim your shot to the left. The same units of measurement apply on the windage adjustment knobs.
What Distance to Use
It depends on what you are hunting and what type of scope you are using. A misaligned sight can throw a wrench in your gears if you aren’t careful and well prepared. Your sights will do the majority of the work for you once you zero in on the proper alignment. So, where do you begin? The overall goal is to have your crossbow sighted and zeroed in at 20 yards. When using a red dot sight you have to be able to determine the distance from you to the target. Adjust your red dot to whichever distance best suits what prey you are after. For whitetail deer, 40 yards. For smaller game, you can get away with 20-30 yards. Multi reticle drop compensating takes more time to sight. The majority of lines are designed to have a distance of 2o yards in contrast to the line directly below it.
Step by Step: Sighting in Your Crossbow Guide
Step 1: Gather Materials and Adjust Scope
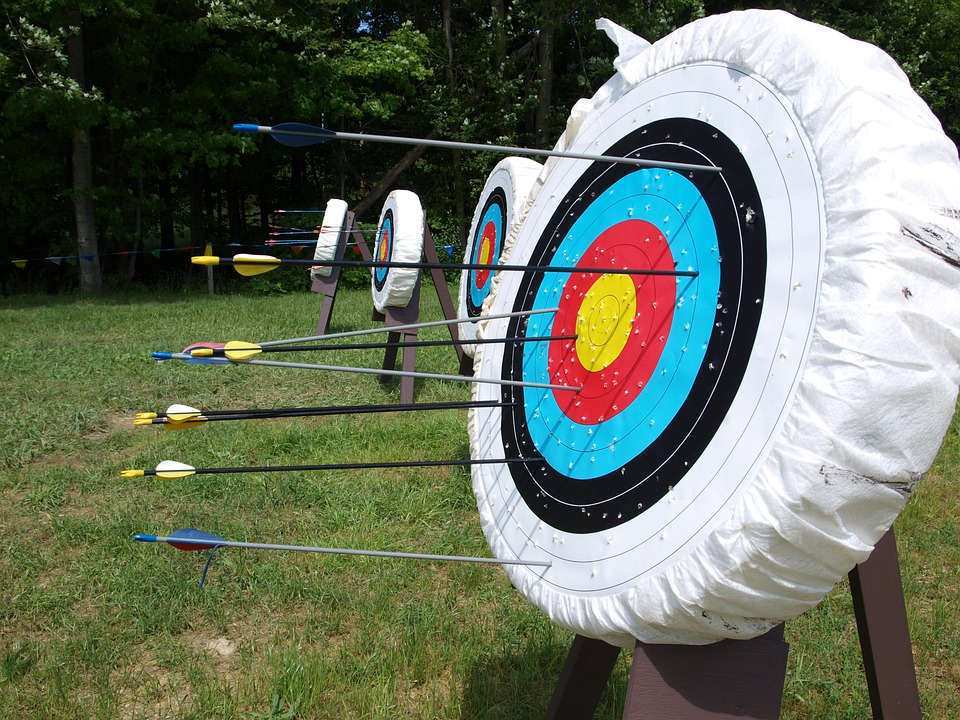
You should get into the habit of grouping your arrows into three arrows per distance. Repetition will help you make sure you are able to consistently hit the same place on the target each time you shoot. You will need a few dozen arrows each time you practice. Next, make sure that your scope is ready for use by checking that it is clean, mounted onto the crossbow properly, and that your scope rings are well suited for your scope itself.
Step 2: Measure 20 Yards Away and Fire First Shots
These shots will serve as your rough guide when sighting in your weapon. Then , cock your crossbow and place an arrow from your first arrow group into your crossbow using your hand or a rope. Align the top most red dot/reticle or red dots with the bull’s eye. Squeeze the trigger quickly using only the fingertip of your index finger. Follow these steps multiple times.
Step 3: Approach Target and Adjust Scope Accordingly
Estimate the inches it will take for your arrow grouping to consistently hit the bull’s eye. Remove the protective caps from the adjustment knobs and turn the elevation adjustment knob clockwise until you hear 20 clicks, equivalent to one inch. Do the same for the windage adjustments. However, remember to adjust these for 4o clicks or two inches.
Step 4: Rinse and Repeat with Yardage Adjustments
Take another series of shots from 20 yards. Align the top dot with the bull’s eye once again and fire three more arrows into the target. Make the appropriate changes until all of the arrows land within the same range. Once your shots are consistent, move back to 30 yards, 4o yards, and then 50 yards. You can make adjustments as needed. Keep the protective caps in your pocket or a bag after removing them from the adjustment knobs to prevent losing them.
How to Sight in a Crossbow Scope without Shooting
If you need to zero in your scope but don’t have the time or space to fire safely, rest assured. You can dial in the scope’s top rings without making a single shot. Most crossbows today are produced with a much simpler adjusting phase than their older equivalents. For example, you can use the Bore-sight. This is an additional laser sight attachment. Although sighting in your scope without ever having fired an arrow will not be as accurate as if you had done so, you can still get it dialed in as long as you consider the bow torque, arrow speed, and arrow drop.
If using a red dot, you will need a sandbag, clamps, or a stack of magazines to compensate for the lack of stability. Next, simply move the windage and elevation knobs to move the reticle to the top center of where your laser is hitting. Start with the shortest distance pin and make the appropriate changes to your target or targets. Now, prepare to take your shot as if you were actually loosing an arrow. You will see a point on the target produced by your laser device. But remember, this does not yet account for the arrow drop. Light doesn’t drop, but your arrow certainly will. Make sure to align your dot just a hair above the target’s bull’s eye.
You will need to sight in each individual pin so continue adjusting your pins and moving the targets accordingly until each of the dots are properly sighted in and you would feel comfortable aiming at a living, breathing, moving target during a hunt.
Save Time and Keep Your Scope Sighted In
Most crossbows today are highly efficient and manageable and stand the test of time much better than those of the past. With that being said, they are still susceptible to human error and wear and tear. With routine maintenance. the occasional adjustment, and replacement parts when necessary your bow and scope can very well maintain the accuracy and performance of its youth.
Some manufactures recommend switching out your strings and cables annually. However, with proper care and waxing, strings can last 150 shots or more before beginning to stretch and creep. You should make a habit of tightening your bolts and grooves each time your crossbow shoots and make sure you are paying notice to your cam tilling and tiller alignment. With time, improper cam integration can lead to altered arrow flight. You will notice wear marks on either side of the arrow shaft due to poor alignment with the flight track. This may also present as the arrow hitting consistently left or right of the intended point of impact. Each side of the bow and the timing dots in each cam should be equal in measure. This means that the pull weight and length are identical or near identical and ensures that your bow is not “out of till”.
Final Tips
I know. That’s a lot of information to retain and put into practice. Please remember that in order to properly sight in your crossbow with the precision, speed, and accuracy that hunting demands, you must be able to shoot your arrows into tight groups first. Take it one step at a time, repeat the whole process from beginning to end as frequently as you are able, refer to the manual when necessary, and have fun! Sighting in your crossbow is the gateway to a clean, humane kill.
FAQ
Where do you sight in a crossbow?
You can sight in your crossbow at a shooting range, an open field, or your back yard just as long as you can do so safely. It is strongly encouraged that you use some type of shooting aid when sighting in a crossbow. The average shooting range will have them readily available to you. However, if you are not at a shooting range or can not find a suitable aid you’ll still be able to get your scope sighted in. Begin by measuring exactly 20 yards away from your target and set up your tools and arrows there.
When sighting in a crossbow scope do you follow the arrow?
YES. When adjusting the pins always remember to chase the arrow. If you are hitting high, move your pins higher. Hitting too far right? Move the pin to the right. At ten yards, your arrow should hit high or just above the bull’s eye but centered horizontally.
What type of arrowheads should you use to sight in your crossbow?
You can sight in your crossbow using arrow shafts and broadheads identical to those that you plan to use when hunting. However, many hunters choose to stick to field points when not in the woods.
Why is my crossbow shooting all over the place?
Before you make any adjustments, make sure all of your bolts are tightened and tips are secured. If that is not the issue, make sure you are not jerking or making big movements when pulling the trigger. It takes very little movement to throw your crossbow off of the intended target’s markings. Using a shooting aid and engaging the trigger quickly are helpful tips to avoid inaccuracy
Can you bore sight a crossbow?
Yes. A crossbow can be bore-sighted and can give you a closer and clearer view of your target at closer distances. For example, when you are targeting with a bore-sighted scope, you will see any target with more accuracy than with a standard scope. This gives hunters with minimal skill or poor eyesight a better opportunity to make the shot.
When sighting in a crossbow what will give you more stability?
Please note, a crossbow is the most accurate when shot with the aid of a shooting rest. This provides stability and helps to ensure repetitive accuracy in the field. There are several types of aids and rests available for purchase so be sure to research all of your options and make an informed decision based on your hunting needs.